Overview
Follow the steps below if you registered your machine to use a static IP to connect to the UCSD network via Ethernet with Mac OS X 10.3.x and above.
Critical Concepts
- You must first register the Mac with the IT Services' Hostmaster. See more detailed instructions here.
- Using the information provided to you by the Hostmaster, manually set up your ethernet settings.
Steps to Take
Manually Set Up Network System Settings
- Click the Apple icon at the top left corner of your screen to open the Apple menu.
- Select System Preferences/System Settings and click Network on the left side of the tab
- Select the Ethernet tab and then depending on the MacOS version click Advanced or Details....
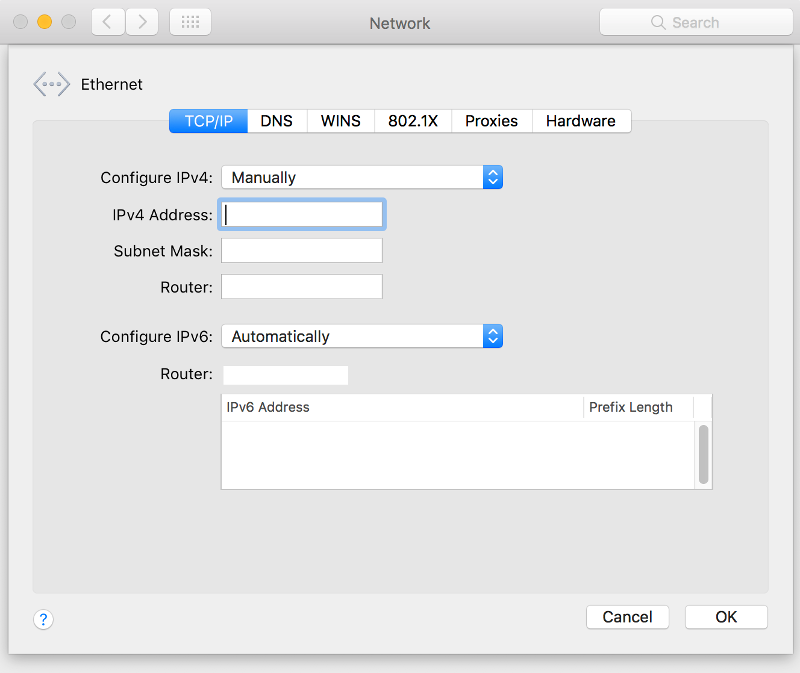
- Click the TCP/IP tab.
- Open the Configure IPv4 drop-down menu and select Manually.
- Using the information from the Ethernet Registration e-mail message you received after registering, enter your IP Address, Subnet Mask, and Router into the appropriate fields.

Enter DNS Servers and Search Domains
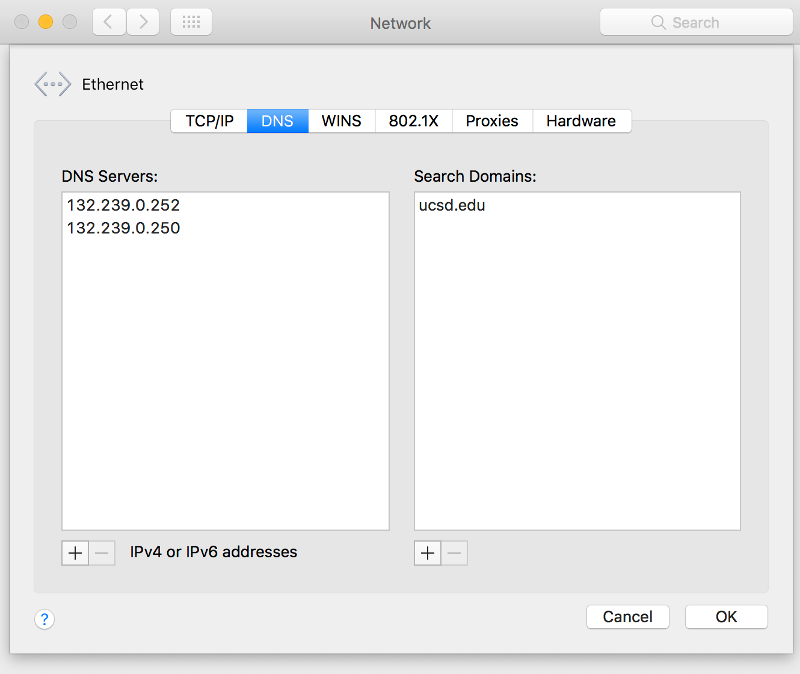
- Click on the DNS tab
- Click on the + icon under DNS Servers, then enter 132.239.0.252 and 132.239.0.250
- Each DNS Server IP address will need to be entered individually
- Click on the + icon under Search Domains, then enter ucsd.edu
- Click OK

If you still have questions or need additional assistance, please contact the ITS Service Desk. You can call us at (858) 246-4357, email us at support@ucsd.edu, or submit a ticket at support.ucsd.edu.